I’ve had a vintage plain cream ceramic pot (with matching lid) sitting on my work bench for a few years now. The pot is a useful size, and being square uses space effectively, but I decided that it looks BORING! Having just bought a set of Sharpie marker pens (at a much-reduced price- yay!), I had been doodling on paper to try out all of the different colours, and then decided to expand the doodling experiment to include this pot!
The project is very easy and only requires:
- Permanent marker pens (Sharpie or another brand, but they must be PERMANANT to stop some of the design coming off every time you handle the pot!).
- A ceramic pot, of whatever size and shape you fancy. A white or cream pot is ideal, as your lovely design will show up clearly.
- Some masking tape- or washi tape or cellotape would do, as it is just to provide a guide for the design.
- Nail varnish remover and a cotton bud, for tidying up any mistakes with the pen (not that you’ll make any mistakes of course!).
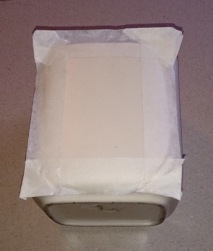
First, clean and dry your pot thoroughly, so that your pen marks will adhere to the container, and the colours won’t be obscured by mixing with dirt. Next, use some masking tape to mark out a guide for your design. I am going to show you the design I made, so the masking tape was used to mark out the rectangle in which I wanted my design to sit.
At this point you may like to try out your design and colour combinations out on a piece of paper. As my simple design was made up of a series of parallel lines in rainbow order, the first thing I had to do was lay out all of my pens in the order in which I wanted to use them- I know this sounds really simple, but I did find it a massive help when it came to drawing the design on the pot.
Next I worked out which colour was to be used for the central (longest) diagonal line, and which two colours were to be used for the two corners parallel to the centre line. Then I counted through the pens to work out which two colours would mark out the lines between the central line and the corners. You could measure the pot and then measure and mark out in pencil where you want the lines to go, but I drew them free-hand as I wanted a more relaxed look.
I then filled in the lines between the initially marked ones. The final step with the pens was to colour in the other two corners (in this case the top right, and bottom left corners).
Finally I peeled off the masking tape, and used a cotton bud dipped in nail varnish remover to tidy up the marks where the ends of a couple of the lines had bled under the tape.The steps above were then repeated on the lid of the pot.
When using Sharpie markers on ceramics, the piece can then be baked in the oven to make your design even more durable; if doing this then make sure that the container that you are using is oven-proof, and when the heat is turned off leave the piece in the oven to cool down slowly to avoid cracking.
This project has brightened up my workbench, and I now have another unique piece of storage for some of my crafty bits and bobs!


Comments on: "Craft Storage Upcycling DIY" (5)
Oh you’re so crafty! I want to work more with sharpies, me and the sharpies doesnøt have a confident realationship, yet:-) Have a wonderful day! Best, Mette
LikeLike
Thank you- working with sharpies was a little easier once I had worked out that you can erase any mistakes using nail polish remover (when working on ceramics)! Good luck with your projects!
LikeLike
[…] some more of my posts on DIY craft storage see here, here and […]
LikeLike
[…] some of my previous posts on craft storage DIYs please see here, here, here and […]
LikeLike
[…] Decorated ceramic pots […]
LikeLike